Hello everyone,
I have been asked several times how I realized texturing my aircraft. Then I will go and try to show you my method. Certainly not the best method but it works pretty well although there must be many features to simplify all this.
Note: I use version 2.49b (or more) of Blender and version 2.6.8 (or more) of The GIMP.
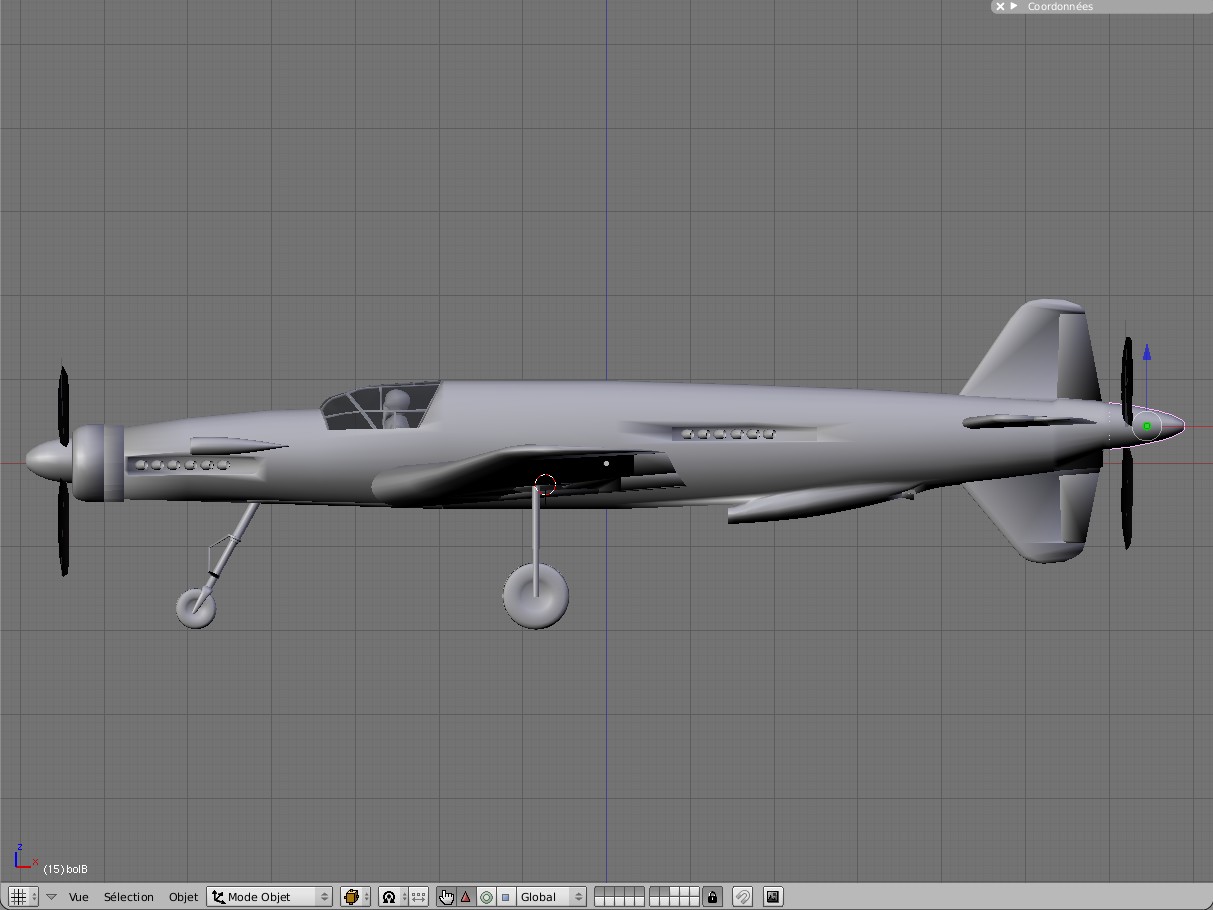
To do this we will from Dornier DO 335. First I had not done so, and then I like this device.
Here:
Blender :
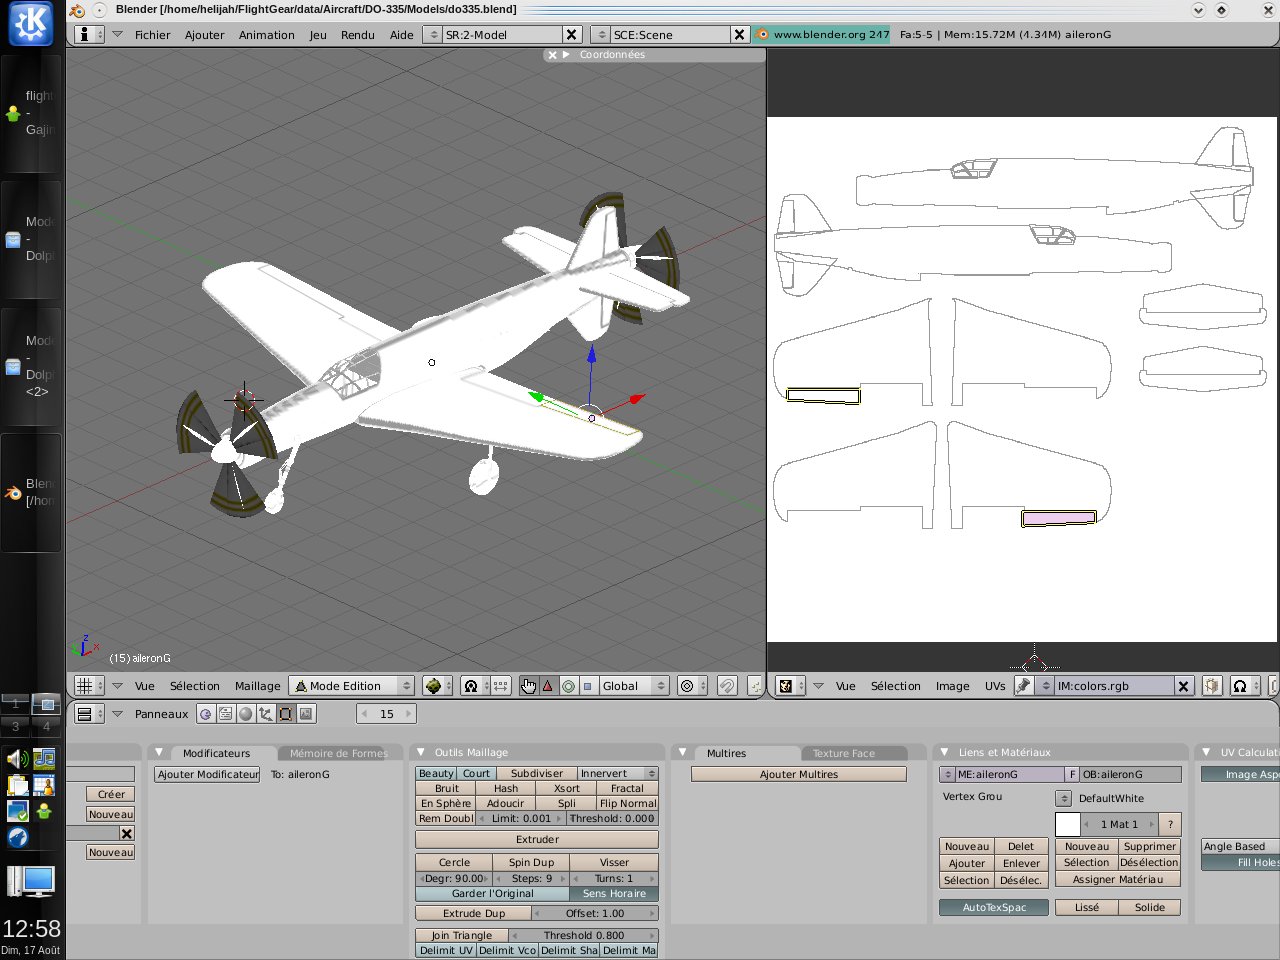
Before we must prepare work areas. We will view the left and right 3D view UV Map (Shift F10)Projections by the view selected:
Select
the object you want texture ( 'right click'), choose the appropriate
view ('1 '), switch to edit mode (' tab '), select all the points (' a
'), then ouvir UV Map menu ( 'u') and choose "project from view"
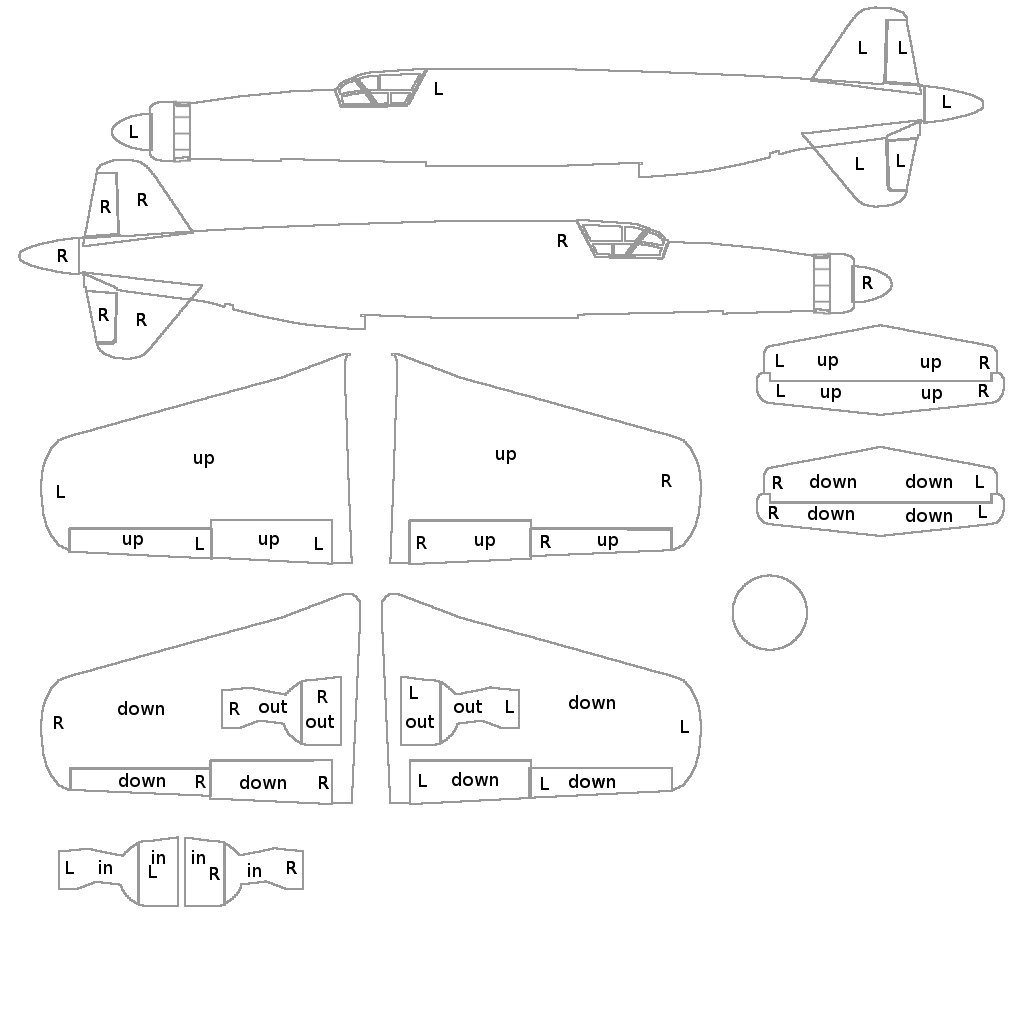
Object select only the right half of the facets, which will allow us to separate the UV map right and left of the object
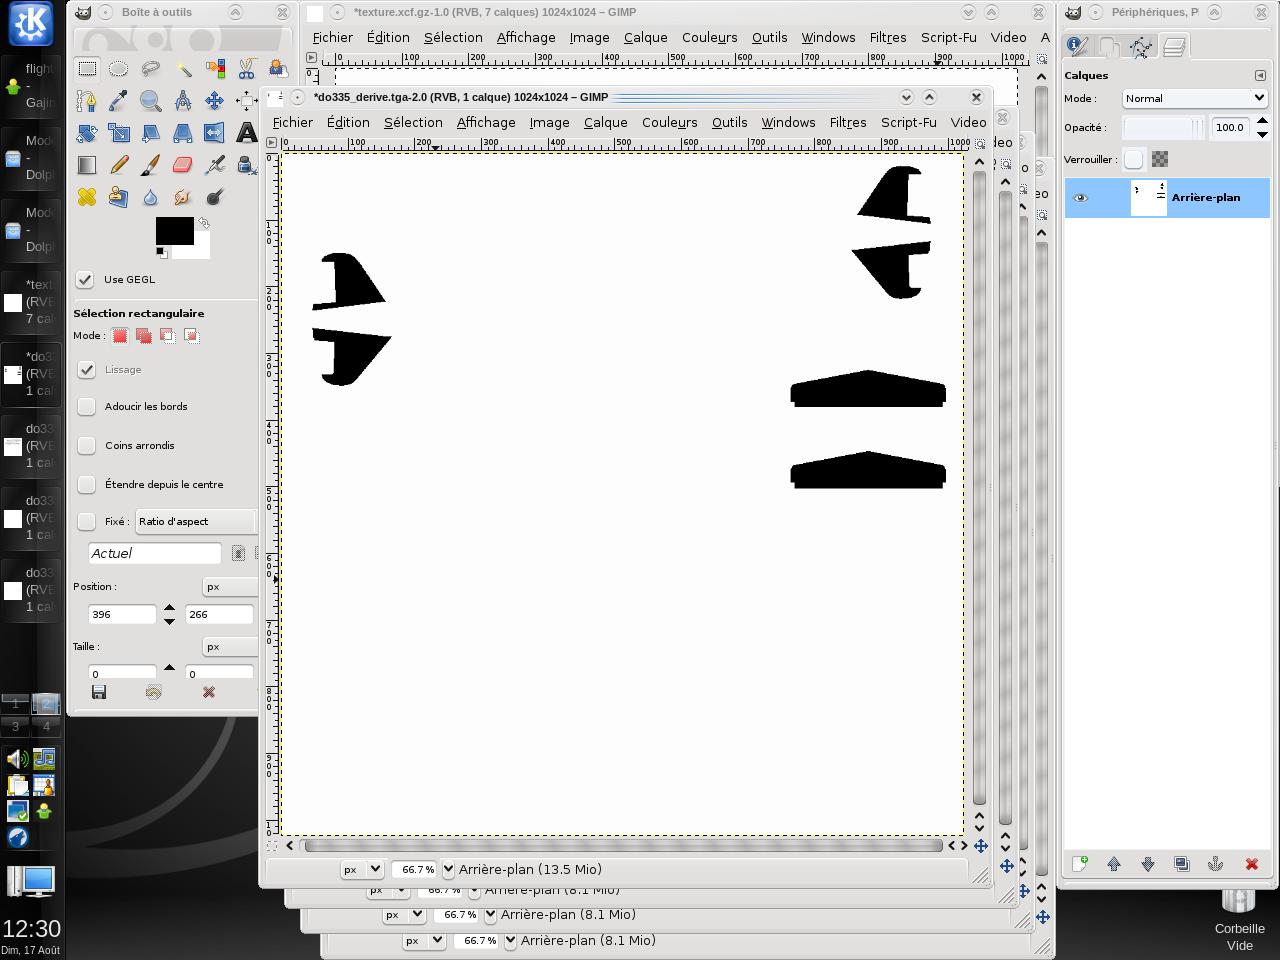
Finally save the image in the current directory via "UV-> Scripts-> Save UV Face Layout" using the default settings which will allow us to obtain an image 1024x1024 in TGA format
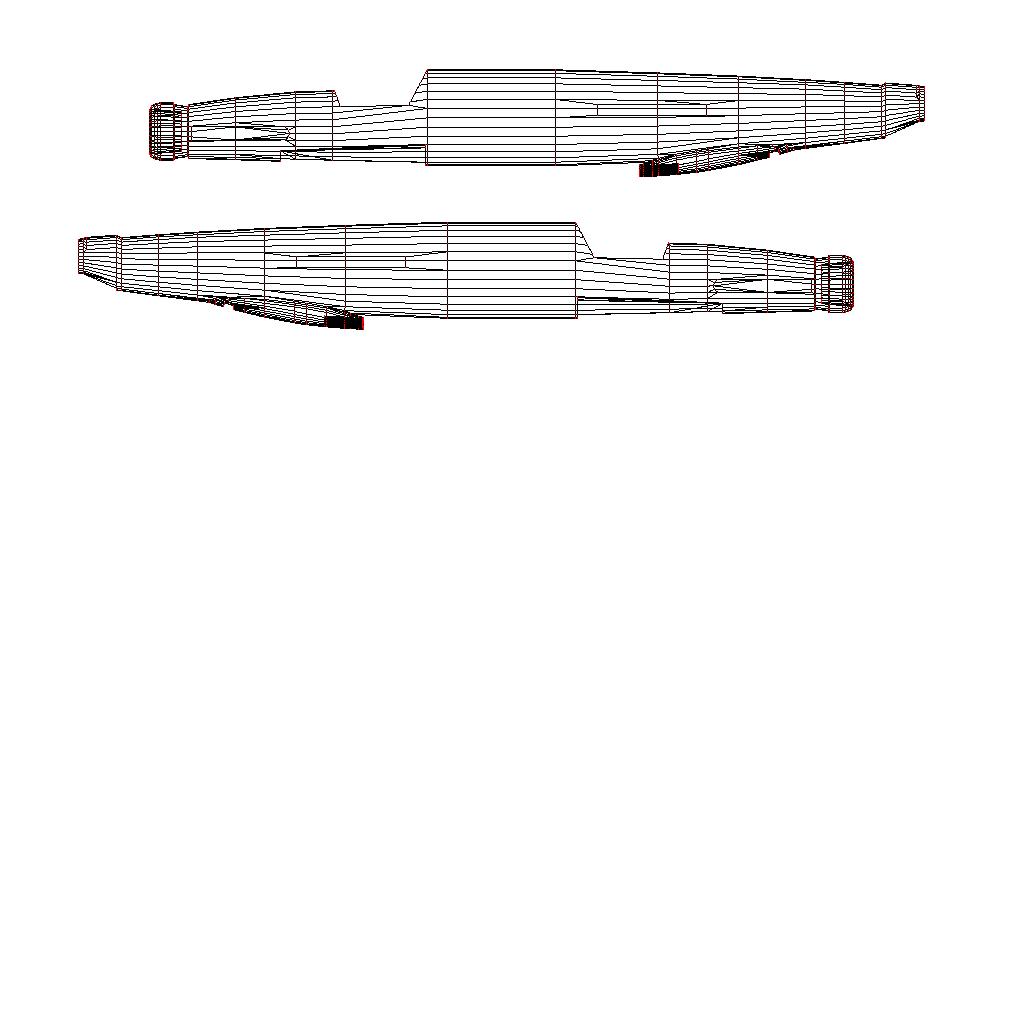
Here are the results:
You will have to repeat this for each airplane parts that need texturing. Of course, taking soint never be cheuvaucher different projection. Breakfast very simple trick. Once the first image created can be used as a texture to put correctemenent UV map for the next object. Obviously
it is even easier, as and when able to reconstruct an image containing
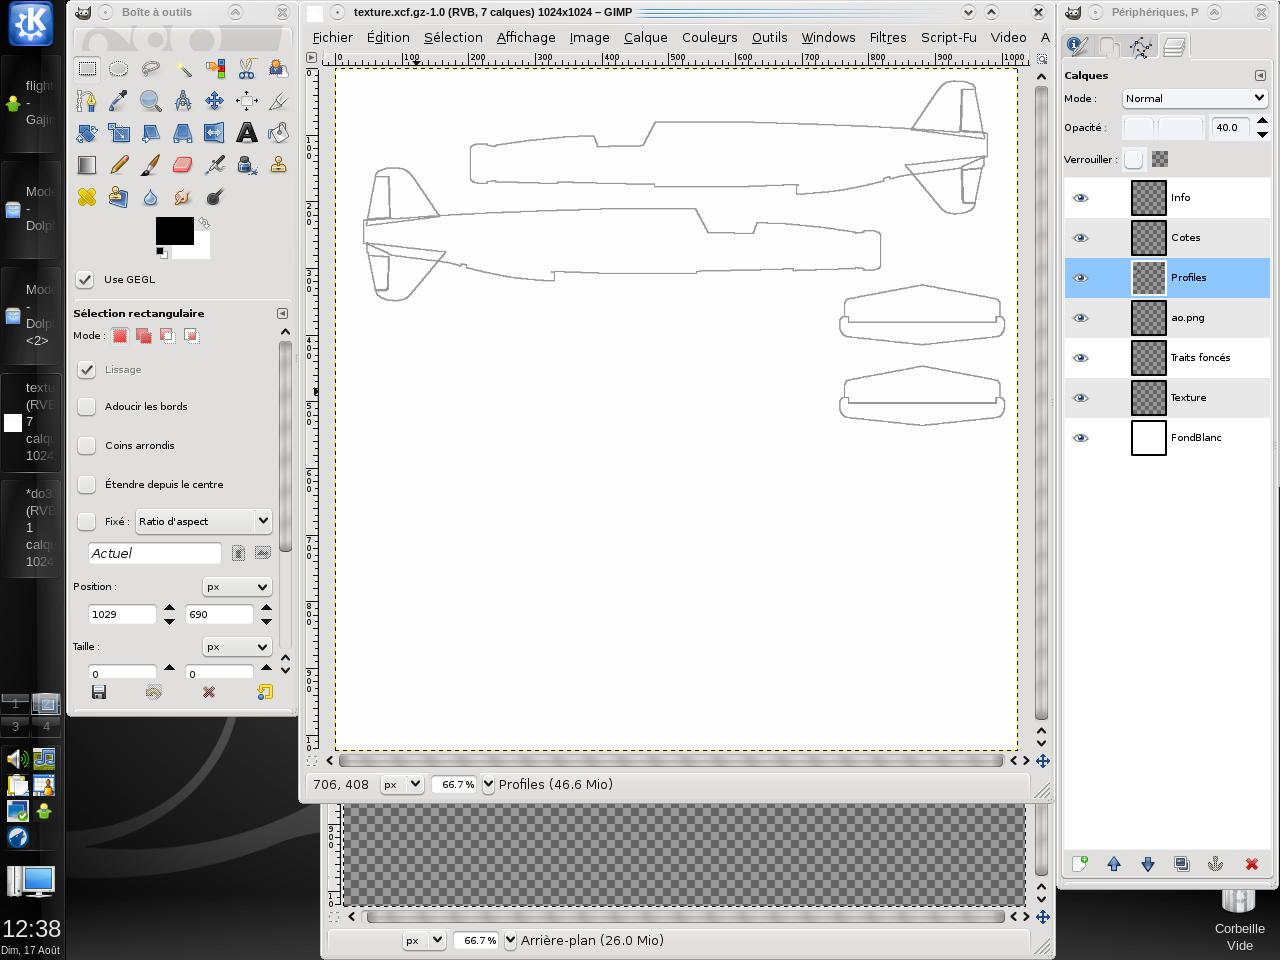
all the profiles already created and use that as a texture like this:
Little
detail is important: Do not forget to save its different growth,
primarily in the Blender file (if you intend to do going back and forth
between Blender and The Gimp (like myself) , and of course ultimately do not forget to export these changes to the file. ac otherwise it will not work.
The Gimp :
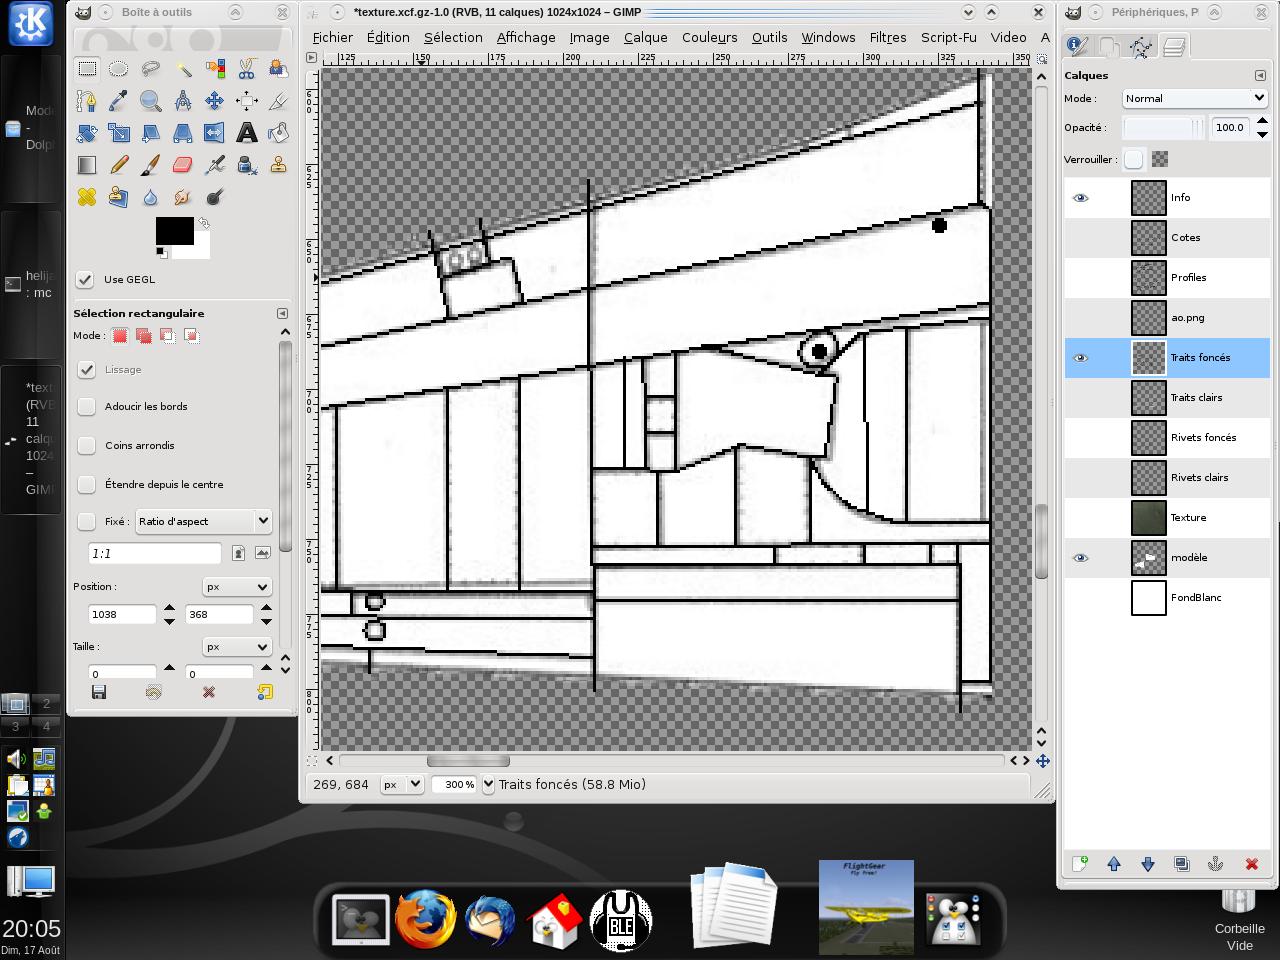
To
begin, prepare the file that contains layers ..... The easiest way is
to take one of those existing and simply empty the history layers that
everything is already available quickly and easily.
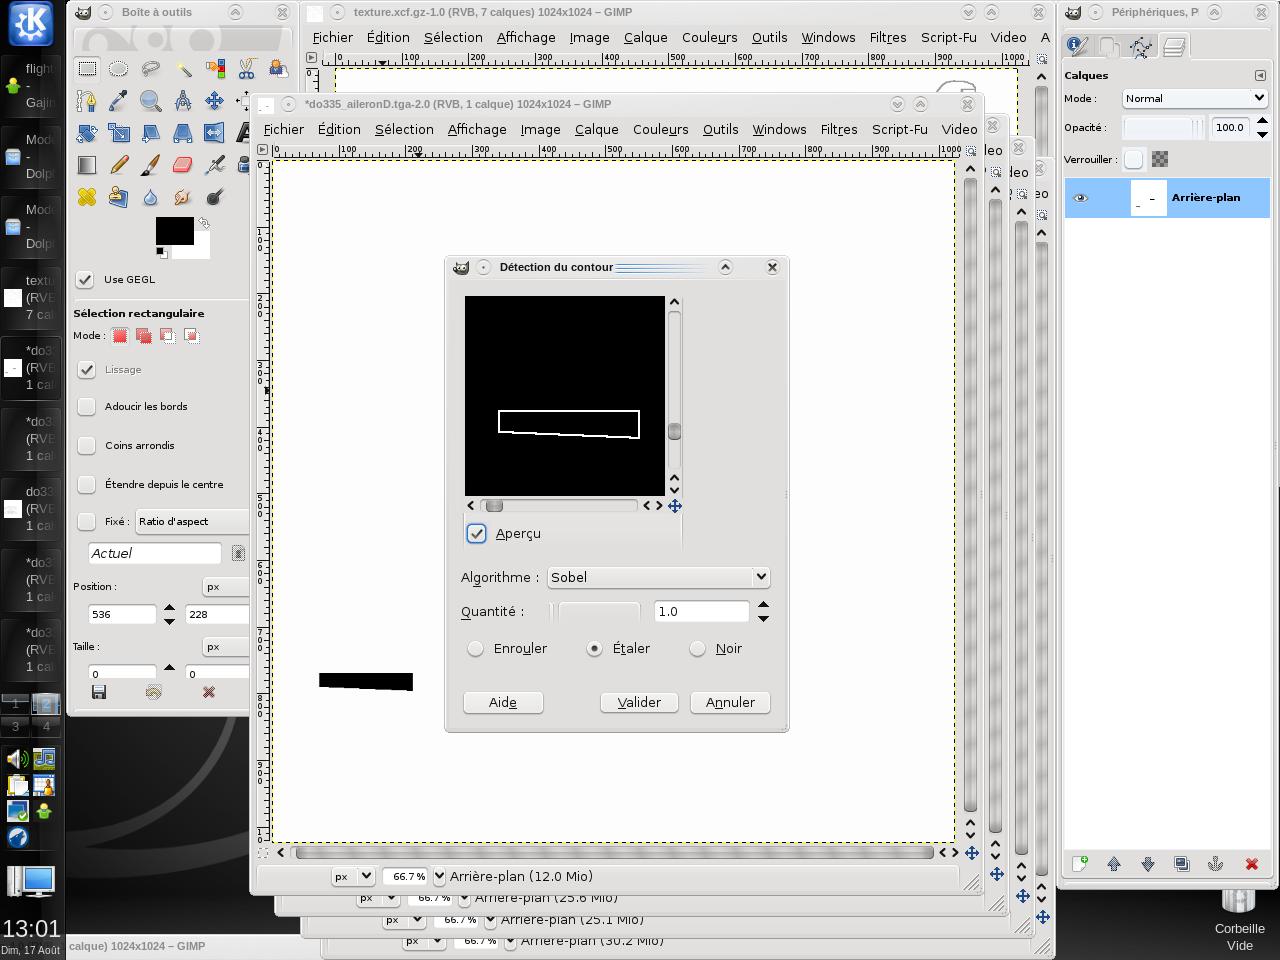
Let's open the image generated in Gimp. Then with contiguous selection tool (press 'u') will click anywhere outside the forms. Then we invert the selection via the right click popup.
We delete the contents of the selection by Ctrl + x "and we comply with all the tools of paint.
Then, via the filter menu, we choisisons in the detection of edge contour option:
We meet with the edges but well marked in white on black background. Here, I'll let you guess. Invert the colors in the color menu should make us a great service;)We have to make the white background transparent before we can glue together the layer profiles that awaits it.For a
copy, let's not complicated, a simple Ctrl + A then Ctrl + c in the
image bous just edit, then go into the picture that looks all that,
make the active layer profiles and finally to Ctrl + v.Rest of course to repeat all that for each object. Not very long, but pretty grim;)
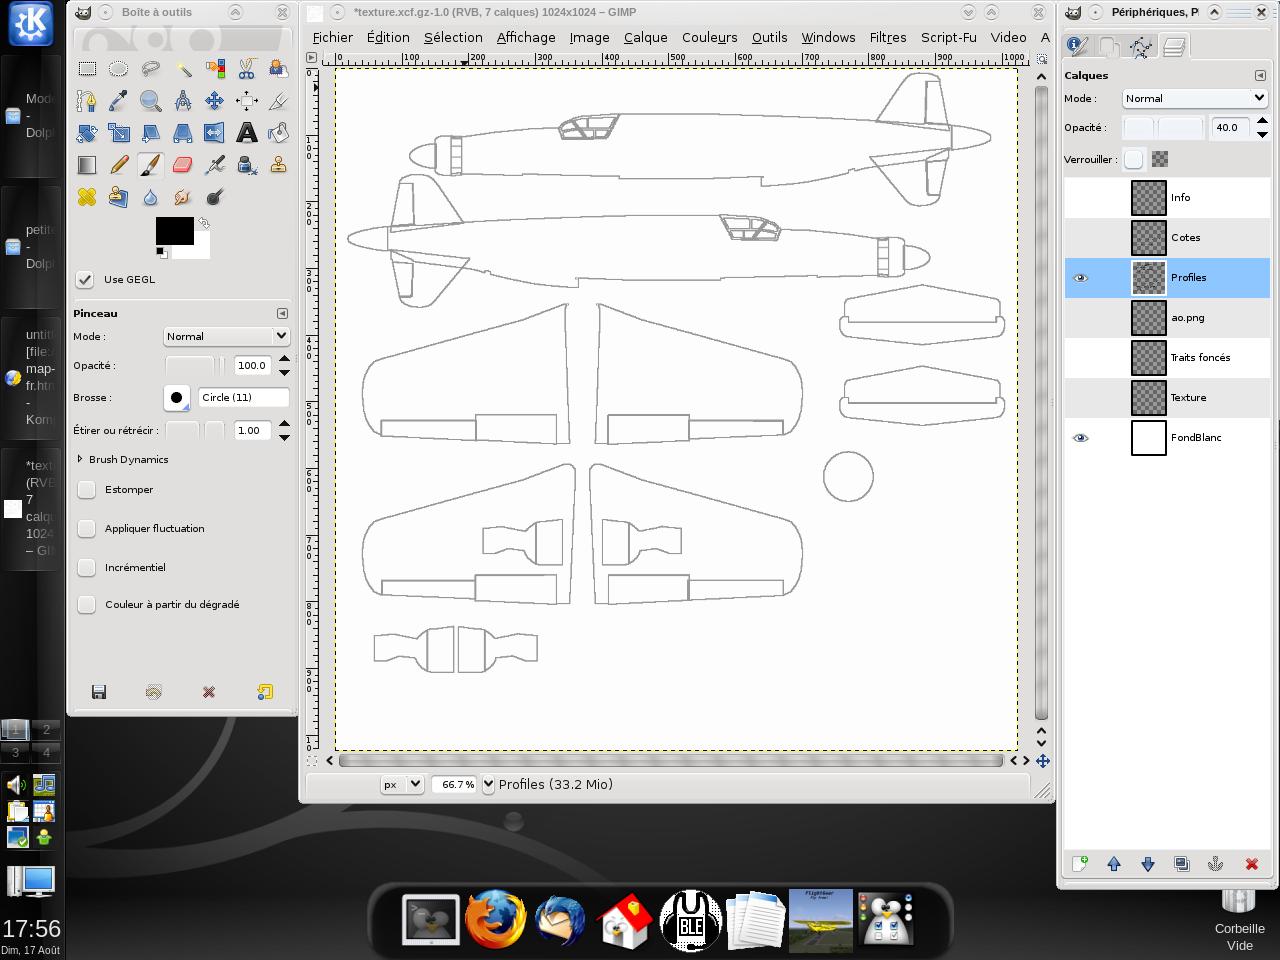
Well after a few minutes, hours, months, years .... all depends on the time it takes, we get something like this
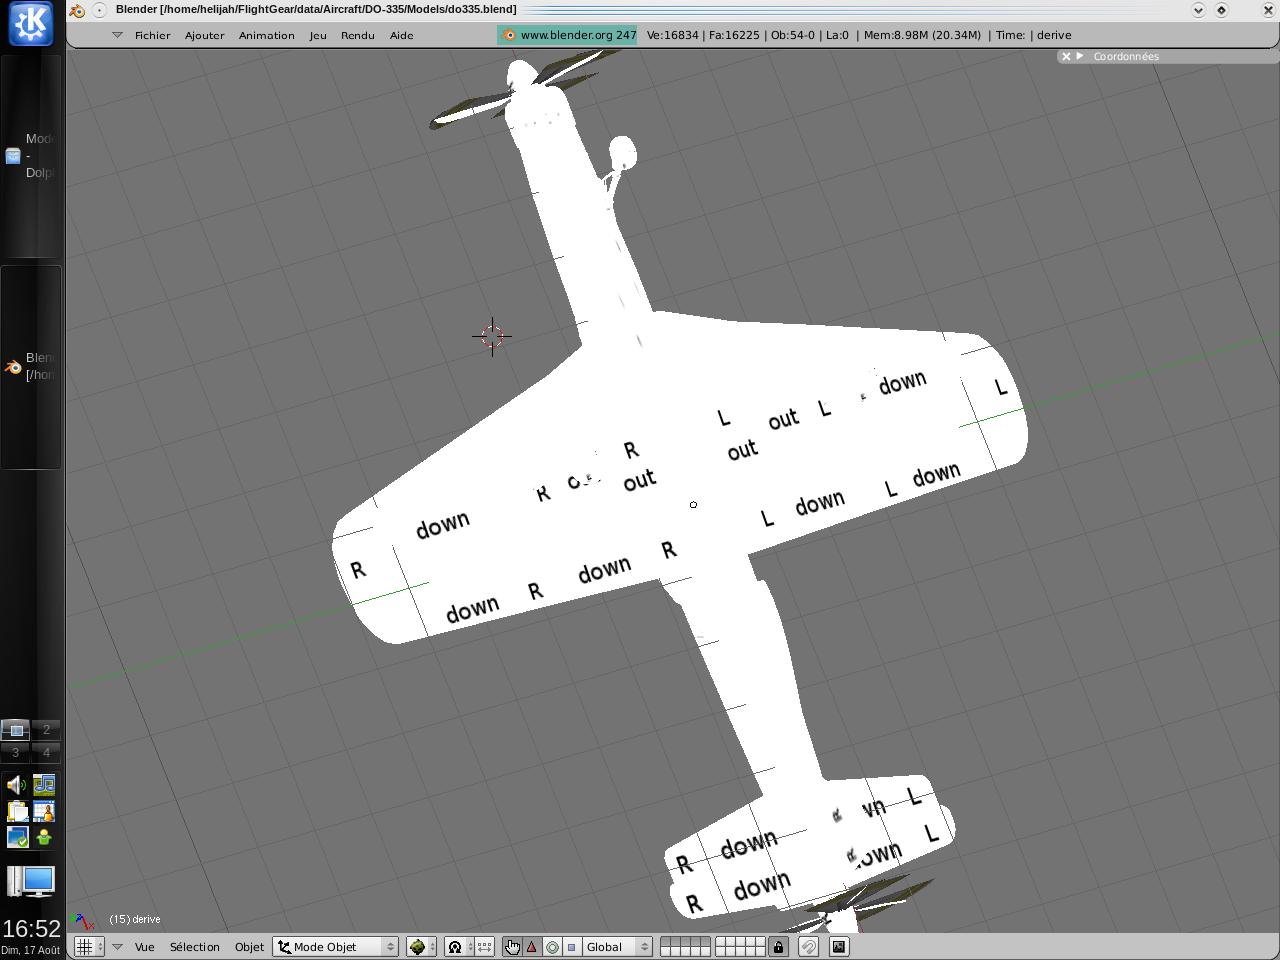
On this, you will notice the slap "Odds" which will be useful to avoid inverted textures. To do this we just write a few judiciously placed information of the kind 'R' for Right 'L' for Left etc. .... This gives us:The result when used as a texture in Blender:You see that often, inatention, parts are reversed, some mirrors on the UV Map in Blender and everything back in order.
Although
we are therefore once all this is to move on. First place a united
non-white background history to see what we do and also a special layer
model.
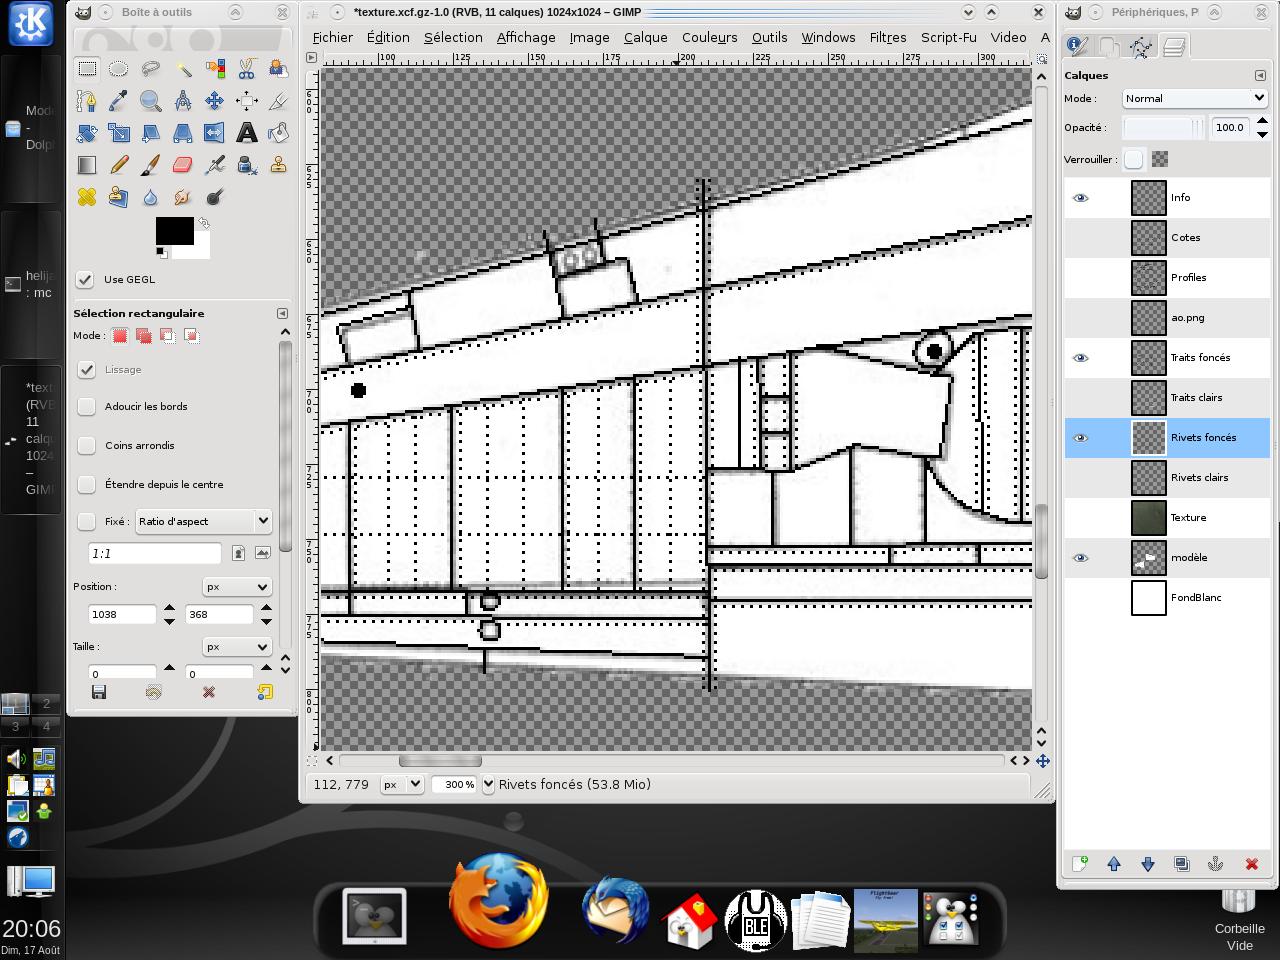
And in another layer provided for acueille features we will draw some lines on the model And in another layer we are going to make points that give the idea of rivets:Then
we will copy the layer lines and rivets in other layers in which we
shift one pixel to the right and down and playing on the parameters of
brightness and other features we will rivets and these new layers
almost white.
Here, with a little time and patience, we get this:
But you will notice quickly that it is too mixed to a pleasant to eye. Well we'll just reduce the percentage of opacity of these new layers! dark lines, clear lines, rivets and rivets dark dark for something like: